“There is no such thing as bad weather, just bad kit. If a man dies of hypothermia he has simply made a poor equipment choice.”
SSGT James Harris – 1988 Basic Training (Introduction to Combat)
An entire website could be dedicated to mountaineering and expedition equipment. There are many out there, some good, some bad and an abundance that are sponsored by manufacturers of products. Over the last two decades I have spent thousands of pounds on outdoor equipment and made many bad purchases for hillwalking in the UK. Nowadays I stick to brands that have performed well in the environments I operate within (wet, cold and miserable) based upon my experiences in these climates.
Key considerations is always going to be weight, comfort, longevity and cost. Cost is the major consideration for many, especially when starting out (with a full compliment of decent gear easily spiralling to around £2K), however, I always spend as much as I can afford on the items that make the most difference to the experience – boots, waterproofs, shelter and cooking equipment. Safety items, such as navigation equipment is never equipment to compromise on, however, this is generally obtained cheaply unless you are buying high end SatNav devices etc. Unbiased reviews of equipment are extremely hard to find on the internet – Trail magazine is a great source for equipment reviews and they produce a few annual Gear Guides which are superb for walking in the UK. The only small pearl of wisdom that I would add is that ‘you are going to get wet‘ no matter what you wear (or its cost) – the question is ‘how long is it going to be before I get wet?‘.
If you can afford to do so avoid auction sites – sorry eBay! There are a huge number of fakes on the market – if a deal sounds to good to be true it probably is! You don’t want to be stuck at a 1000 metres up on the Cairngorms wearing a fake Goretex Pro jacket looking forward to getting into a fake Hilleberg tent in 100 kph winds (I once bought a very expensive North Face jacket at a bargain price from eBay – 2 days into the trip in the Pyrenees the zips fell off! Both embarrassing and dangerous).
The guide written below is what I would typically carry or wear on a 3-4 day expedition you can simply scale this down dependent on your time on the hill. Most of my kit has been used extensively on several trips which are generally confined to Wales and Scotland.
Stay safe & happy hiking!
The first rule of packing – remove everything you did not use on your last trip (if this is your first trip on the mountain you will invariably pack much more than you will use!) typically 15-20kg maximum. If you can’t lift it unaided or have to sit down to get your pack on, you are packing too much – time to rethink the luxury items.
On all of my first trips into the mountains I always packed much more than I needed – set out with the mindset that being uncomfortable is inevitable. Once you embrace this fact you will immediately see the size of your pack reduce (the degree of discomfort is in your control). The most debilitating effect I see on most new expedition members is not the discomfort through lack of sleep, bad weather or expedition food, but the early onset of fatigue by carrying too much weight. Always calculate food, water and group safety kit (generally issued on the day of the expedition) into the total weight you have to carry.
When it comes to mountaineering in the UK, getting wet is a certainty! The military endorse a system referred to as ‘wet and dry routine’, this simply means wearing wetter clothes in the day, dryer clothes at night (saving weight on multiples of spare clothing and ensuring you always have a set of dry clothes in a medically critical scenario). Consider drying lighter items like socks or base layers using your body heat when asleep. You will come back smelling bit ripe, but, again inevitable!
SPOILER ALERT – there is no delight in putting on damp, cold clothing in the morning, but if it’s raining anyway then you’ve lost nothing so there is no point getting another set of clothing wet. Your movement on the hill will aid the drying of your clothes and most modern mountaineering fabrics are built to rapidly dry. So unless you are planning a day of being static, in mid-winter, where cold, wet clothing can be hypothermic and dangerous, just get on with it, you will find the benefit of a lighter pack is much more beneficial!
When it comes to physically packing your rucksack taking a logical approach will serve your needs best. A general mantra is to pack heavier items lower down as close to your back as possible. Always have in your minds eye a picture of yourself high on a mountain in high winds and rain trying to locate your gloves! So, pack your most used items in hood flaps, all the way down to the least used items (probably spare clothing) at the bottom. Safety kit should always be easily locatable.
Always pack items in separate dry bags (the guy you bought that new pack off in the shop was bullshitting when he told you it was waterproof!). I tend to group common items together according to my routine. For instance, my dry clothes are in the same bag as sleeping bag because I use them at the same time, my brew kit is stored with my stove etc. There is nothing worse than going on an expedition with the guy that does not have a system here, you will always be standing around freezing your balls off while his kit is flying over the hill.
My last advice on kit packing is to avoid hanging and strapping equipment to the outside of your pack as much as possible (large items, ropes and tents for instance are unavoidable). Once you have completed packing, put your pack on and jump up and down. If it rattles, rectify where the rattle is coming from. I guarantee that if you don’t when you are out and about that little rattle will drive you absolutely insane!!!
When it comes to actually choosing a pack to buy ensure to get it fitted in a shop. Don’t be embarrassed to take a good walk around with it on, if the shop has stairs, go up and down. Packs for men and women both come in different sizes, ensure to check. Always check the zip and buckle quality (I have an Arc’teryx Bora 63, it cost me £500, it is the most comfortable pack I’ve ever used but I have had to replace all of the plastic buckles on the side straps with metal alpine type buckles because they snapped – disappointing at the price point). Pockets are useful, however, the more pockets your pack has the more likely your pack is to leak. If you are going solo you generally have to remove your pack to retrieve anything from them anyway, so other than the organisational value, I tend to avoid, one hood flap will generally meet your requirements.
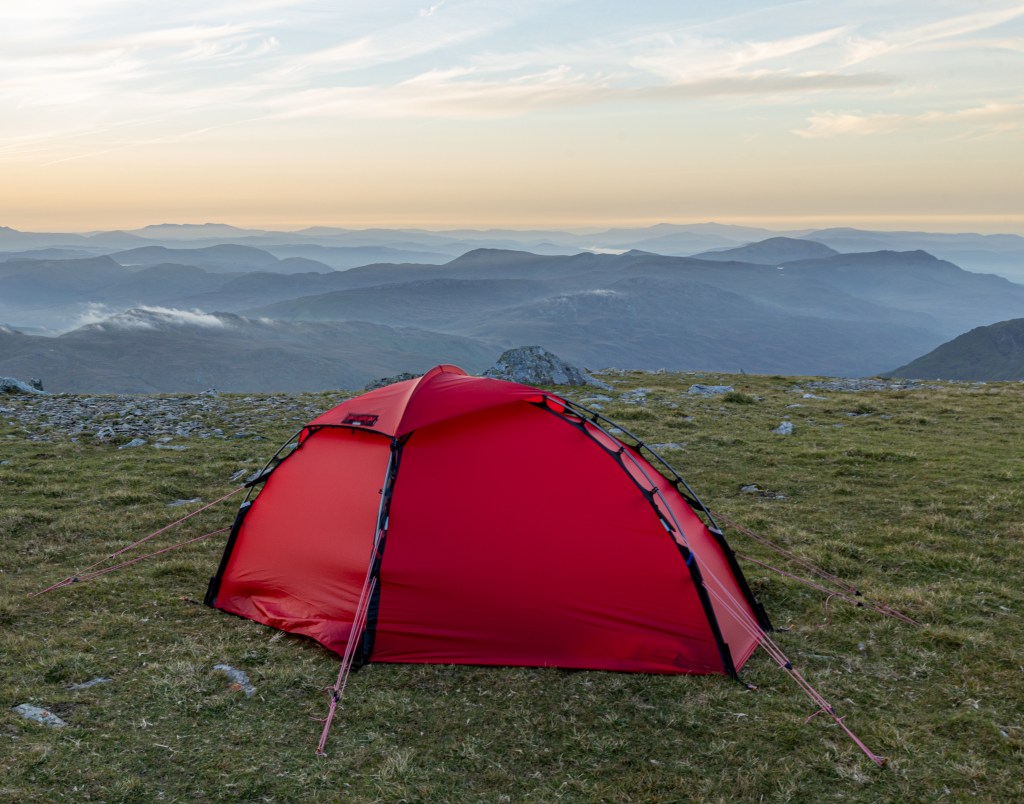
I have had a few tents, some great a lot shit! This is a piece of equipment to spend as much money as you can afford to spend, especially if you are planning Autumn/Winter/Spring trips in the UK mountains. At elevations above 700M is generally going to be windy even on Summer evenings (also remember as a general rule of thumb the temperature will will drop at about 1 degree per every 100m you ascend). Your shelter is your only security you have when your are asleep, a lightweight tent may get you up the hill a little quicker, but I guarantee that you will have an awful nights sleep from the noise and will constantly worry about your tent collapsing. 3 years ago I was the very proud owner of a MSR Hubba NX 1 Man tent. This was the most expensive tent I had ever bought (at the time) and was rated by MSR for 4 Season use (also great reviews). I erected the tent on a calm March evening at around 900 metres in the Carneddau in Snowdonia. At 3AM I felt the wind flatten the tent against me followed by the the main pole breaking ripping the outer shell rendering it useless. This forced me to evacuate to an emergency shelter for the rest of the evening (a 4KM hike in the dark in a Force 8 Gale and a cold night). After that night I made an investment into a Hilleberg Soulo BL which is rated as the strongest 1 man tent on the market (and is superbly built), it did cost £1000 and is much heavier than any previous tent I have owned, but, a solid night sleep is guaranteed. If you are considering 4 Season mountaineering my advice is to spend some time considering your options here and do not economise. Consider your tent a lifetime investment – in fact Hilleberg pride themselves on quality and state that their tents are heirlooms. Practice erecting your tent a few times before your trip, this is invaluable in bad weather and night time conditions, remember the latest the sun is going to go down in Winter is around 1700hrs. The more time you save here the warmer you are going to be and the quicker you can can get a brew and some food going. Tents typically have 5 components, an inner, an outer, a footprint, poles and pegs. So rather than struggling with the footprint, inner and outer separately (especially when windy) I zip ties these components together. Then all I have to do is install poles and peg it. I pack my tent with my sleeping mat inside it, again just to save a little more fuss. Always tie your tent bags to your rucksack once empty and always fix your tent to your pack until pegged. This will save your chasing your tent down the mountain in high winds.
Once in your tent keep yourself meticulously organised, if you get something out, put it away immediately, you never know when you have to get going in a hurry, or in the dark. Finally, ensure you have the right pegs for the terrain, you need specialist pegs for sand and snow. It sounds obvious, but always dry your tent and sleeping bag thoroughly, you’d be surprised how many people don’t and are faced with a mouldy shelter when on the hill – never good!
Sleeping bags and sleeping mats are a personal preference, I use a Mountain Equipment 4 Season bag and Sea to Summit mats. Again, they are all in the top end of the price bracket, but both are top performers. Always check the temperature rating of the bag you purchase, they all state a ‘comfort level’ referencing temperature. I have always leant towards down sleeping bags, but be aware that if you get it wet – thats the end of its usefulness, the stuff sacks they come with are not waterproof, your dry sacks are, buy a decent one for your sleeping bag. My only tip for your sleeping mat is that if its self inflating then ensure you pack a repair kit – mine is packed away in my first aid kit.
Safety kit is a necessity, never remove any of your safety kit to lighten your pack especially if you are a solo walker. The picture below shows the absolute basics that you should be taking with you up the mountain. This list is complimented by your navigation equipment and specialist winter gear if weather demands it (crampons, ice axe, goggles etc.). I do not compromise or spare expense on safety kit, ultimately you are responsible for you own safety and that of other in your party, the consequence of it failing is potentially catastrophic. My safety pack contains; Trauma Medical Kit (not the cheap ones you see in the outdoor shops), Emergency Flare (Electronic IR Strobe – can be seen by Air or Mountain Rescue from several KM away with a battery life of 24 hrs), Personal Locator & Beacon (Garmin GS Map 66i – expensive but works on the Iridium Network in case you need message somebody), Water Filter(Sawyer Mini) and Knife (Small Leatherman – you do not need a Rambo style survival knife!).

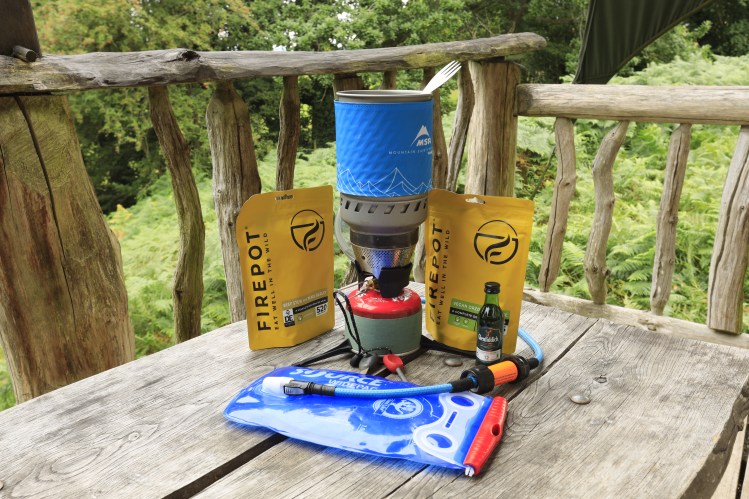
There is nothing more personal than food. I have probably tried every type of camping and expedition meal on the market. The compromise between weight and taste is what it’s about here. Spend some time choosing and practising what you’re going to cook and eat because after a day on the hill the only thing that you will be thinking about is eating – so try at home before you go. Whatever you choose ensure you know how to cook it and it has enough calories to sustain your effort. The food I use is made by a company in the UK (FirePot – around £8 per meal) and is dehydrated but made with natural ingredients (most expedition food you buy is always orange for some reason!). If using dehydrated food remember you are going to need more water – obvious! Always take a couple of ‘cheer me ups’ – this can be anything that will bring a smile and bit of motivation to you and your companions. I vacuum pack some cold cuts, cheese and fruit generally saving them for the last day. For the evening I always take a little tipple of the Jameson to keep my cockles warm!
Cooking systems vary, in both cost, and fuel type. For the UK mountain ranges I found that the MSR Windburner or Jetboil Stoves (both gas) are second to none. My preference is the MSR with a 500ml cup/pot and costs around £200. I normally find a medium size gas canister will easily last 3 days/nights and I use a striker to light them opposed to a lighter. A quick tip – on return mark your gas canister with the number of days used, this way you know if it go with you on your next trip.
I always pack along a small thermos flask. Any boiled water left over after meal hydration and brew goes into the Thermos to speed the next cooking process or is used to make the next brew. I use coffee bags made by a company called Faff which highly recommend.
As a last tip, anything in your cooking system that you can tie together do so (lid to pot, spork to striker etc.), because unless you are really organised you will put something down on the floor and lose it. I remember one trip where I had to make a spoon from the lid off a tub of salt lick left out for the sheep! Finally never cook in a closed off tent – you will become extremely ill!
Lastly, it is illegal to light a fire in any of the National Parks, so don’t! Always take your litter home (including left over fruit and skins) and remember – what goes in must come out! Dig a hole and take your toilet paper home in your rubbish bag. Never do your business near a water source for obvious reasons.
When it comes to hillwalking the ‘The Layering System’ is an important clothing system to get right from the onset of your expedition. So, what is it? In simple terms it is wearing the the most appropriate amount of clothing (or layers) to keep your body temperature regulated for the amount of heat (or not) you are are generating. The key to this is generally set off on your walk cold, you are very quickly going to heat up and you don’t want to be stopping 15 minutes in to take off a soft-shell, because you are already drenched in sweat. Then, add clothing as appropriate to the conditions, if you stop, put on soft shell/down jacket, if it rains put on a waterproof etc..
So what do the layers consist of? Let’s start naked and build out. Underwear is personal – choose what’s right for you. I use SAXX, enough said. We then move onto our base layers, these come in many different fabrics, I choose Merino wool as its great for both cooling and keeping you warm. The fabrics come in many different thicknesses to help with the various seasons you are walking in. They also dry extremely quickly which is great for the UK climate. We then move to mid layers (trousers & soft shell/shirt or fleece). Again there are a 100 different brands for different seasons. I generally go for Fjallraven trousers & shirts and Acteryx soft shells. Find what is right for you. Next, waterproof jackets and trousers. These are graded by hydrostatic capacity, this is an indication of how waterproof the material is, as a general rule the higher the hydrostatic rating the less breathable the jacket/trousers are – so there is a compromise here to be had – do you research and check out reviews in Trail magazine. One piece of advice, get braces for your trousers otherwise you will be constantly pulling them up. My preference for this layer would be Arcteryx or Mountain Equipment. Finally gloves and hats – lots to be had here, but don’t forget inner gloves.
Boots are an expensive investment, so you need to get them right! Firstly decide on the seasons you plan to walk in, secondly assess the terrain you plan to explore on a regular basis. Boots are an area where more money spent doesn’t necessarily equate to a higher quality boot but to a more technical one. Boots are B rated for different seasons and terrain, the higher the B rating, the more rugged, stiffer and warmer the boot. B1 & 2 boots accommodate the use of crampons (these are C rated) for safe snow and ice climbing (4 Season or B2-3). So if you are walking the Peak District in Summer you do not need to spend £650 on a pair B3 rated mountain boots that are more suited to the Karakoram, when a pair of more comfortable approach shoes (B0) would be perfect. Another consideration is the styling or material of the boots (Leather or Synthetic), almost all boots are lined with a Goretex membrane, so it’s a personal choice, both have benefits. Synthetics are lighter (and more fashionable) but are more damage prone in hostile environments like the rock fields of the Cairngorms.
I generally wear a pair of leather boots (B1) for wetter days (Altberg) for areas where there are a lot bogs, like the Elan Valley and I have a pair of identical synthetic B1 rated boot that are much lighter for higher terrain walking like Snowdonia (La Sportiva). When it comes to brands, it’s a 100% personal choice, my favourite brands are Aku and La Sportiva (favourite based on comfort levels only) both Italian Alpine brands and excellent craftsmanship.
When choosing a pair of boots always try them on in the shop wearing a pair of walking socks, never constrain your choice by looks – comfort and support are everything, nobody cares what they look like on the hill! There should be a ramp, or stairs in the shop you can use to test the fit, make sure you do this. I always get a sport insole for my boots, generally speaking, the insoles that come with new boots are shocking (insoles really make a difference and are a tiny cost compared to the boots themselves). Your outdoor shop will definitely have something there you can try with the boot before you buy. Never buy second hand boots – firstly they never fit correctly, secondly when you smell your own feet after a three day walk, you will never want to buy a pair that have been on somebody else’s feet for the last 10 years! Most boots leak at the top, so wear gaiters in wet weather or snow, another small investment that can make a significant difference to dry feet. My last bit of advice is sock choice! Socks are made for different seasons, buy the right ones for you (we all run at different temperatures when it comes to feet) – thicker socks do not necessarily equate to having blister free feet! Always pack some Compeed for the inevitable.
I HOPE THE ADVICE IN THE ABOVE SECTIONS HAS BEEN USEFUL? EVERY TIME YOU GO ON THE HILL YOU WILL LEARN A LITTLE BIT MORE ABOUT THE PERSON YOU ARE AND YOUR PERSONAL TOLERANCE LEVELS TO THE ENVIRONMENT AND WEATHER. YOU WILL GET BETTER, MORE EFFICIENT AND HAPPIER WITH EVERY TRIP YOU TAKE.
Stay Safe & Happy Hiking,
Mark
